Replacing your NVMe SSD - RX
To remove and replace the NVMe SSD media drive on RX III Disguise media servers, follow the steps outlined in the guide below.
RX III media servers ship with a 1.92TB Removable NVMe SSDs, allowing you to easily upgrade or replace your storage as your needs grow.
The following steps are a guide to help users change over the Solid State Drives. Please, read carefully to ensure best practice. If the system does not work after following these instructions, please call our Support team as per the contact details on the last page of this document.
-
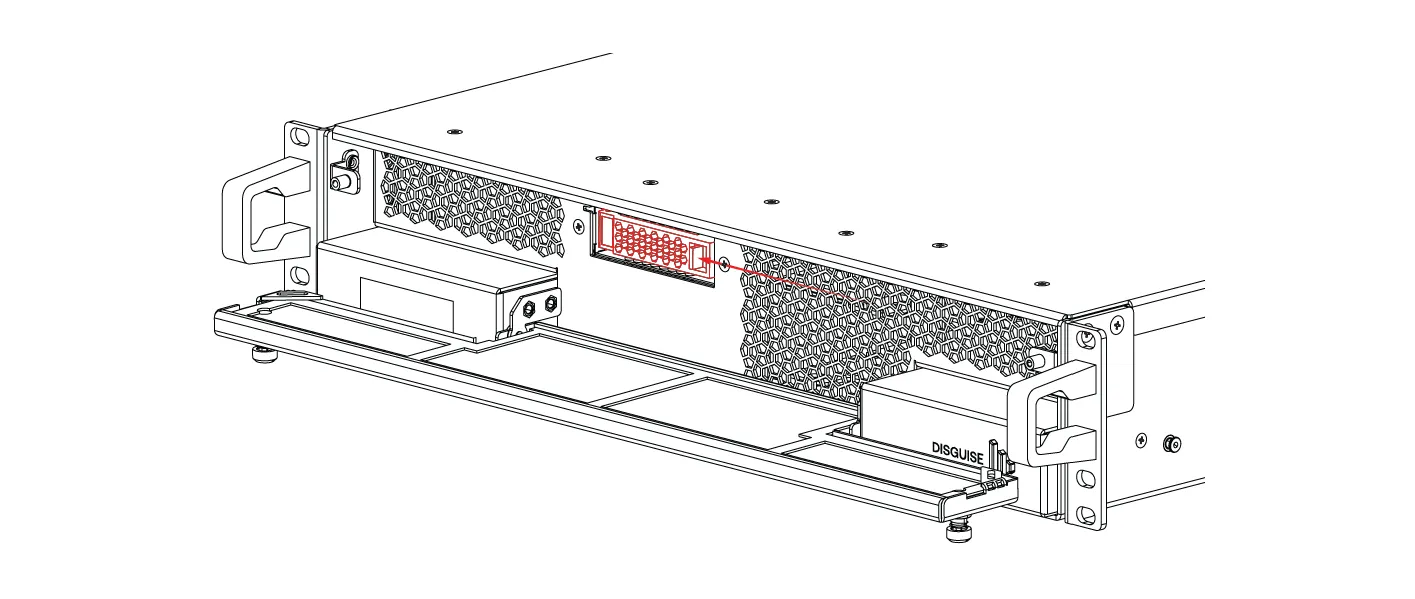
Undo the two thumb screws on the front door of the unit and bring the filter housing down to locate the drive bay door.
-
Push the clip to the left and you should feel a slight release. The door will gently swing open.
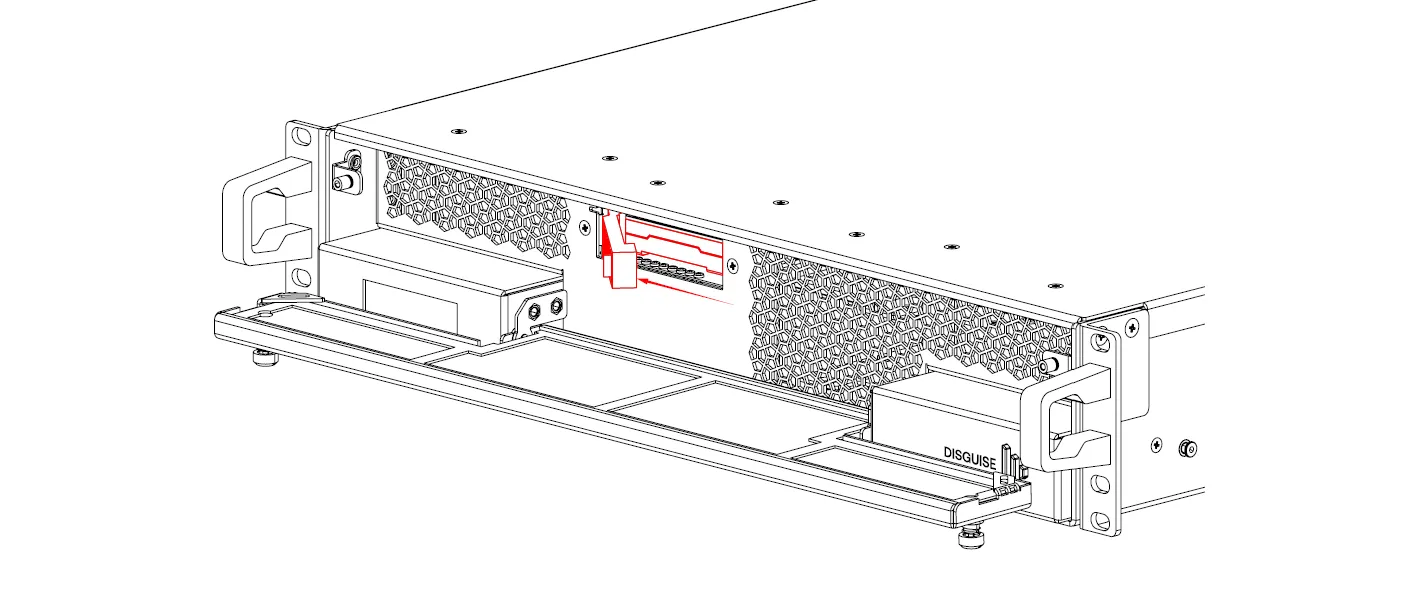
- With the door open, slide it to the left. This motion will disconnect the current drive from the connector, making it ready for removal.
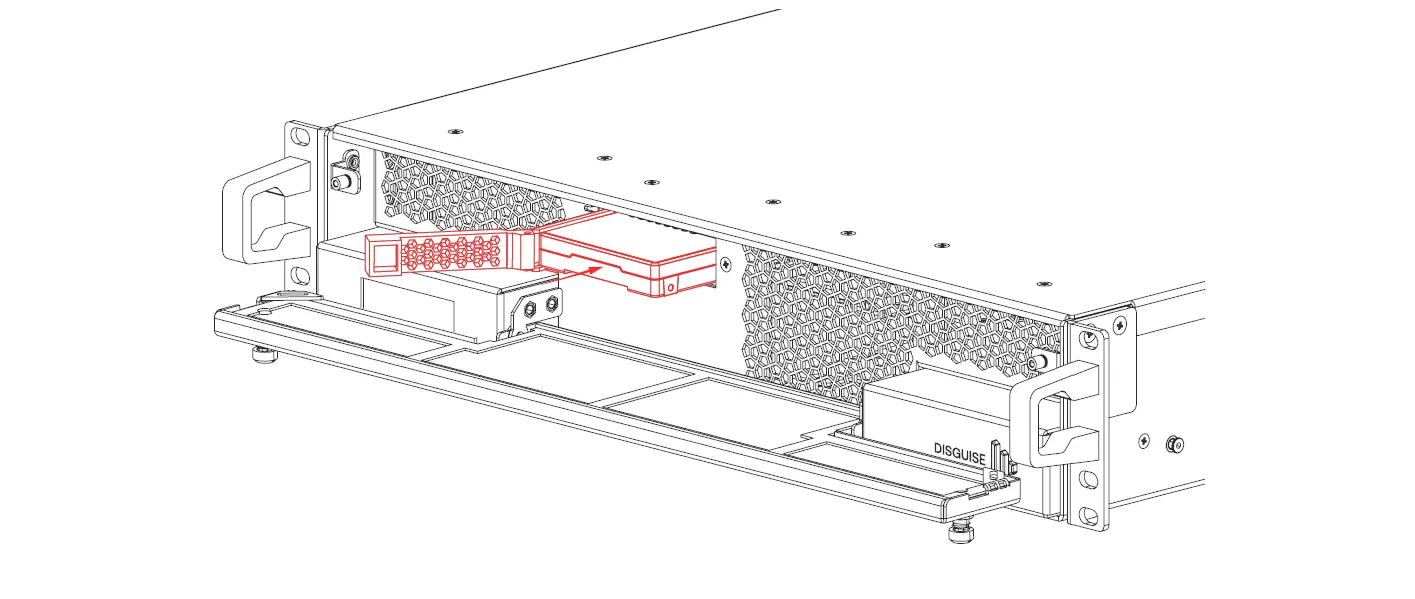
- Pull out the drive caddy carefully. Remove the current drive from the caddy by gently lifting it out. To make removal easier, slightly tilt or bend the caddy while using your other hand to help guide the drive out.

-
Take your new SSD and ensure the connector is facing upwards.
-
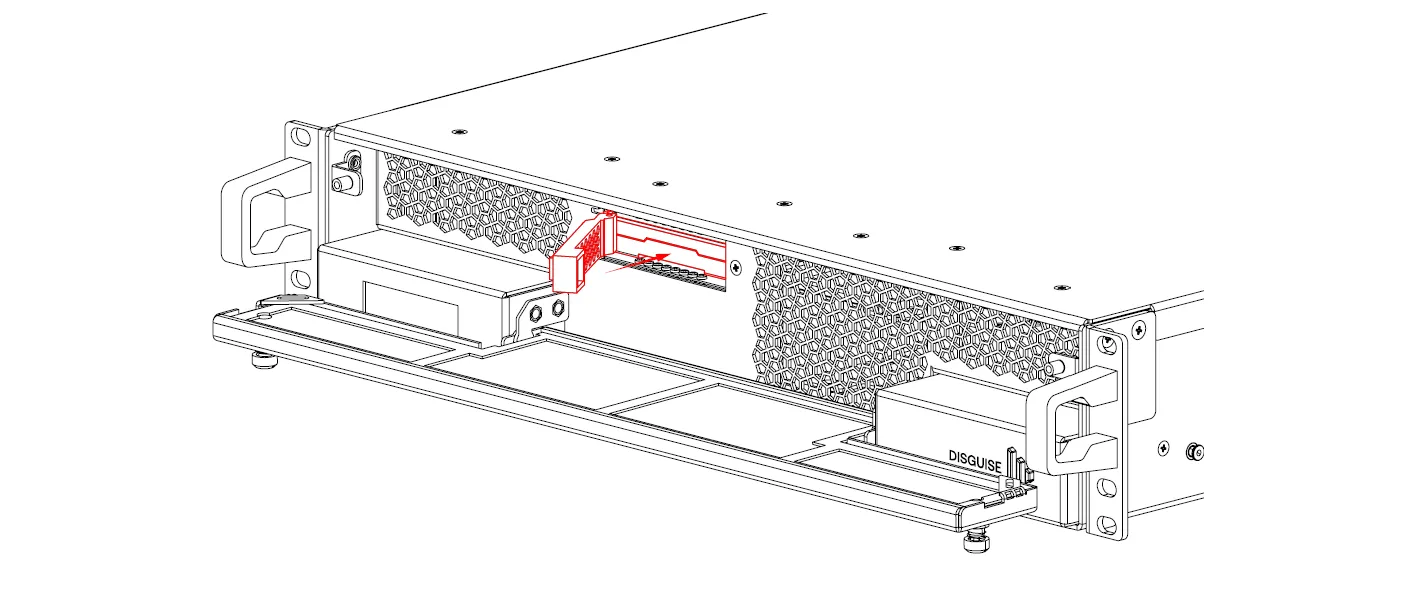
Place the new SSD into the caddy, aligning it properly with the slot. Insert the drive until it is fully seated in the caddy. Ensure the caddy is fully engaged and extends outward for proper alignment and installation.

- Gently hold the SSD by its bottom-left side and slide the caddy back into the bay*. Ensure the new SSD connects properly with the server’s connector.
- Swing the door back to its original position. Push it until you hear a click, indicating the door is securely closed.

* If the drive can be seen to catch on the metalwork. If so, gently lift the left side if inserting to help alleviate.