Agile Camera Device
This topic outlines the Agile ARC 360 camera setup using a Disguise media server.
Agile Camera Setup
Section titled “Agile Camera Setup”Ensure you can meet all of the requirements, and follow the workflow steps below to complete the Agile Camera Setup.
Requirements
Section titled “Requirements”- Agile Camera that supports IP connectivity and SDI output.
- Optional Agile HW Controller.
- PoE switch (for supplying power to the camera).
- Optional Disguise machine with a capture card (only if you want to use the camera as a live video input).
Currently the Agile Camera doesn’t support absolute PTZ (Pan, Tilt and Zoom) commands. Therefore, in order to send the camera absolute PTZ values, it’s necessary to create presets.
Workflow
Section titled “Workflow”The following steps outline the Agile Camera Setup workflow.
- Create a UDP device from Device Manager.
- Set the IP Address
- Set the Port on the UDP device
- Create an Agile Camera device from Device Manager.
- Set the Address.
- Set the Control Device to the UDP device.
- Set the Camera Model.
- Create a CameraControl layer on the timeline.
- Set the Camera field to the camera that was created earlier.
- Click the Command field to open up the keyframe editor.
- Create and keyframe your desired commands for the camera.
- Map the Camera to the video input.
1. Create a UDP device
Section titled “1. Create a UDP device”- Right-click devices in the dashboard. This will open the Device Manager, which contains a list of active devices.
- Select + to open the Device library. This lists which internal or external devices are available.
- Type in the name of the new device into the new device text field.
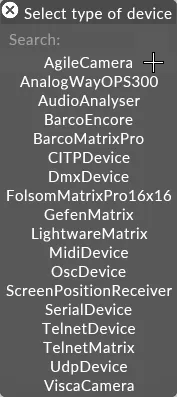
- Hit Enter. This will open a list of device types available in .
- Select the appropriate device type. In the case of Agile camera, a UDP device is needed.

Always right-click on the default device object to add devices to it. If left-clicking you will be prompted to create a whole new device manager which is rarely required.
2. Create an Agile camera device
Section titled “2. Create an Agile camera device”- Right-click devices from the dashboard. This will open the Device Manager, which contains a list of active devices.
- Select + to open the Device library. This lists which internal or external devices are available.
- Type in the name of the new device into the new device text field.
- Hit Enter. This will open a list of device types available in .
- Select the AgileCamera device type.
3. Controlling the camera
Section titled “3. Controlling the camera”- Create a CameraControl layer and add it to the timeline. For more information see Creating layers.
- Create presets & keyframe accordingly.
For more information, see CameraControl layer.
4. Mapping the camera to a video input
Section titled “4. Mapping the camera to a video input”To bring the camera’s live video feed through Designer and output it to a physical screen:
- Patch the capture input to a Video Input Clip (e.g.
videoin_1) in the Video Input Patch manager. - Create a Video layer.
- Set the layer’s media property to the Video Input Clip from step 1.
Agile Camera properties
Section titled “Agile Camera properties”The following properties are available to configure the Agile Camera device.
Address
Section titled “Address”The device ID used when sending commands to the camera. Range 1–255. Use 255 to broadcast — also set the IP in the UDP device to 255.255.255.255 so messages are broadcast on the network.
Control Device
Section titled “Control Device”Defines which device in the device manager is communicating with the physical camera.
Camera Model
Section titled “Camera Model”The type of camera using the Agile UBus protocol. Currently only ARC360 is supported.
New Address
Section titled “New Address”Lets the user change the camera address.
- Enter a new value in the new address field.
- Left-click Set.
Preset #
Section titled “Preset #”Specifies which preset is saved or recalled. There are 256 preset slots, 0–255.
Left-click Recall to manually recall the selected preset number.
Presets are saved within the camera device, and only support Pan, Tilt, and Zoom.
Presets can also be triggered from the CameraControl layer, using the CameraRecallPreset command.
Pan Tilt Jog
Section titled “Pan Tilt Jog”Left-click and drag in the jog control to manually position the camera.
Zoom Jog
Section titled “Zoom Jog”Left-click and drag in the jog control to manually change the zoom of the camera.
Invert Pan
Section titled “Invert Pan”Flips the value sent to the camera during jog for the pan axis. Boolean (Normal / Inverted).
Invert Tilt
Section titled “Invert Tilt”Flips the value sent to the camera during jog for the tilt axis. Boolean (Normal / Inverted).
Invert Zoom
Section titled “Invert Zoom”Flips the value sent to the camera during jog for zoom. Boolean (Normal / Inverted).
Supported commands
Section titled “Supported commands”The following commands are supported for use with the CameraControl layer.
CameraAutoFocus— Enables automatic focus. When on, manual focus viaCameraFocusis disabled.CameraBlack— Black level (0–1).CameraBlueGain— Blue channel gain (0–1). Only takes effect whenCameraExposureModeis set to Manual.CameraExposureMode— Exposure mode: Auto, Manual, Iris priority, or Shutter priority. Manual gain, black level and white-balance commands only take effect outside Auto mode.CameraFocus— Manual focus (0–1). Only applies whenCameraAutoFocusis off.CameraGain— Camera gain (0–1). Only takes effect whenCameraExposureModeis set to Manual.CameraGammaMode— Gamma curve: Straight or Standard.CameraGoToPreset— Recalls a preset slot (0–255). Pan, Tilt and Zoom are stored in the camera’s preset memory and recalled together.CameraImageMirrorMode— Image orientation: Desktop Normal, Desktop Mirror, Hanging Normal, Hanging Mirror.CameraIris— Iris aperture (0–1).CameraNightMode— Toggles night mode on the camera.CameraOnOff— Toggles the camera power on or off.CameraRedGain— Red channel gain (0–1). Only takes effect whenCameraExposureModeis set to Manual.CameraShutter— Shutter speed (0–1).CameraVideoOutputMode— Sets the SDI output format: NTSC/PAL analogue, or 1080i / 1080p / 720p at various refresh rates. The camera must be power-cycled usingCameraOnOffafter changing this value.CameraWhiteBalanceMode— White balance mode: Auto, Indoor, Outdoor, One Push, Auto Tracing, Manual, One Push Trigger, plus Auto/Outdoor variants that include sodium lamp sources, and a fixed Sodium Lamp Source mode.