Cameras and POV
Mapping Matter has three viewpoint primitives:
- Saved views — toolbar-driven snapshots of the Perspective camera that you can jump between.
- POV camera — a perspective scene object with an aim point, useful as a stand-in for a fixed observation location or a documented render position.
- Observer — a person object that places the camera at eye level, supports WASD walkthroughs, and unlocks the human acuity analysis.
Saved viewpoints
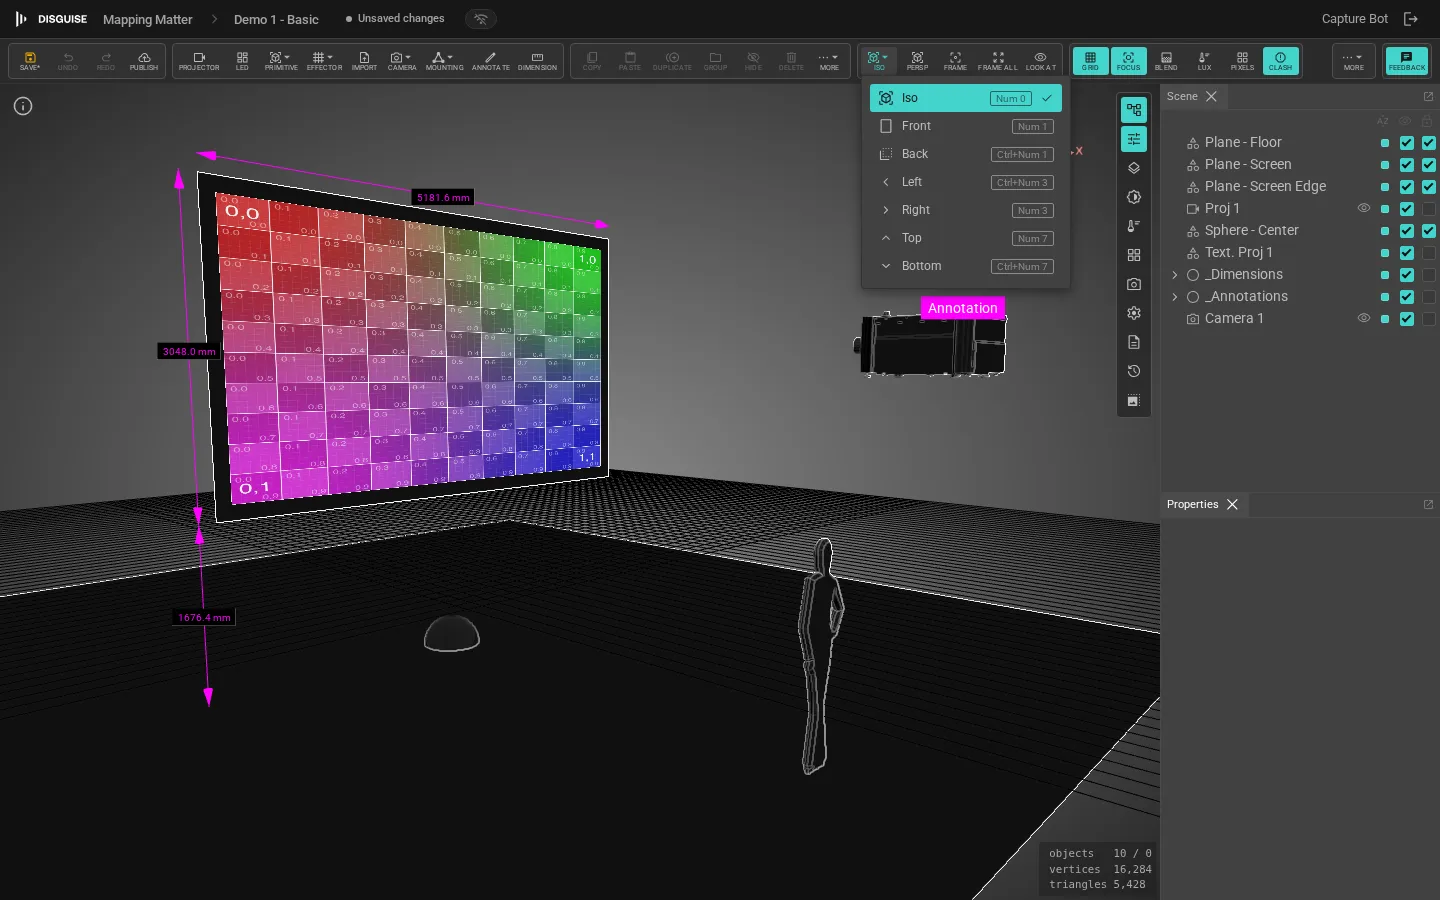
Section titled “Saved viewpoints”Click the View dropdown on the right of the toolbar to jump between Perspective, Orthographic, and the six axis views (Front, Back, Left, Right, Top, Bottom). The label updates to show the active view (View: Perspective, View: Orthographic, View: Top, etc.).
- Perspective and Orthographic are both free-orbit views — you choose which projection you want and keep your current viewing angle. Switching between them with
Num 5flips the active projection in place. - The six axis views snap to a clean axis-aligned orthographic view (and don’t free-rotate by right-drag). Switching to one of them auto-frames the scene.
You can also reach the same views with the numpad — Num 1/3/7 for Front/Right/Top (hold Ctrl for the opposite), Num 0 for Perspective, Num 5 to toggle ortho/perspective in place, and Num 2/4/6/8 to orbit a perspective view in 15° steps. See Keyboard shortcuts for the full numpad scheme.
POV camera
Section titled “POV camera”A POV camera is a perspective camera with an aim point — closest to a traditional 3D-software camera object. Add one from the toolbar’s Camera popover and pick POV camera. The camera body appears in the scene and an inset preview of what the camera sees opens in the viewport while the camera is selected.
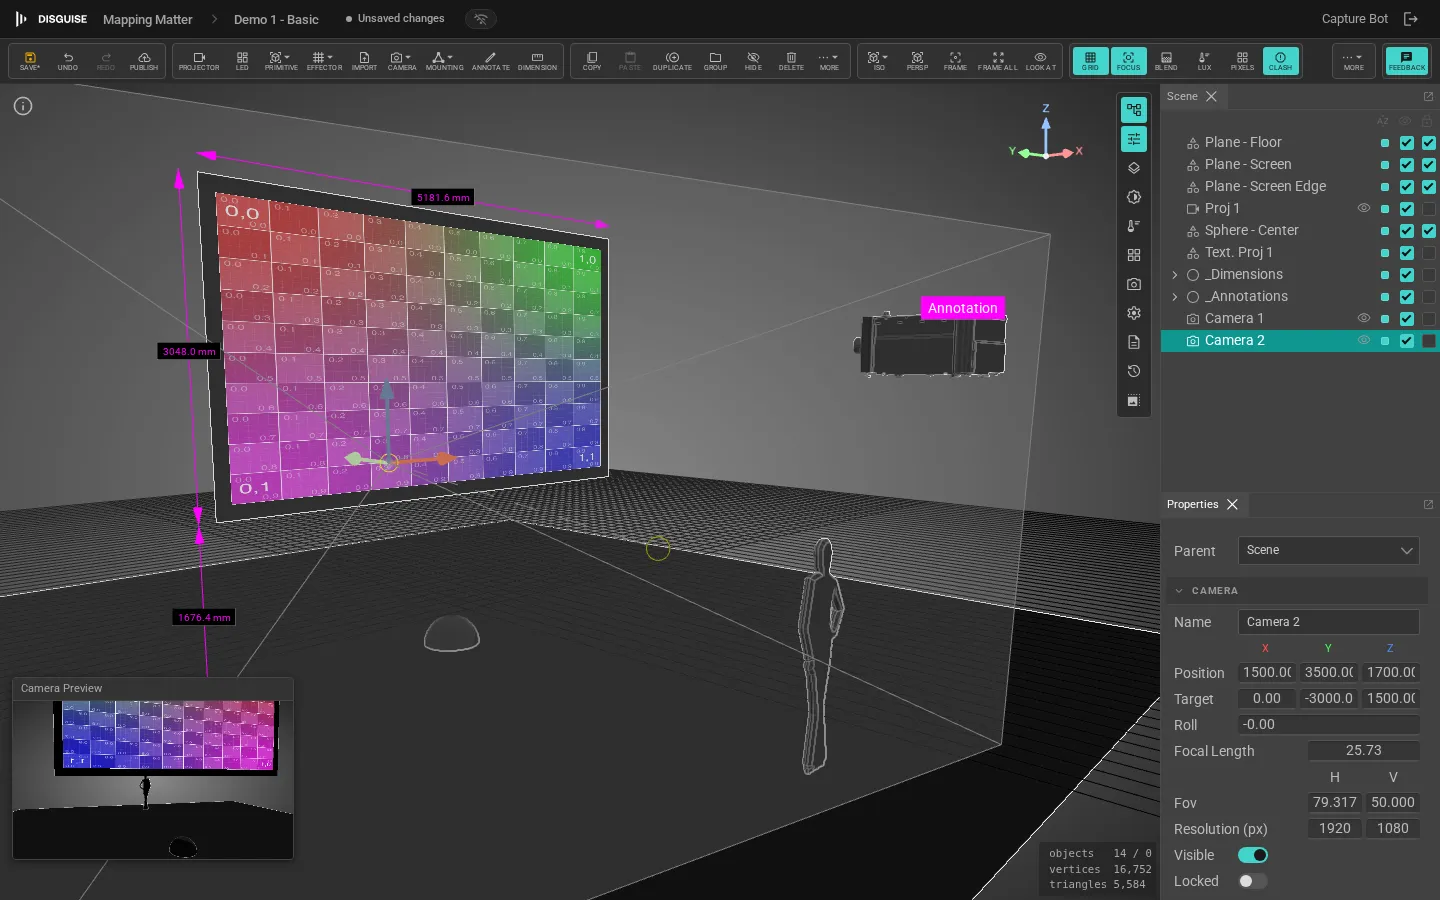
In the POV camera’s Properties panel:
- Type — Perspective or Orthographic.
- FOV / focal length — in degrees and millimetres.
- Resolution — H × V pixels for any rendered or exported still.
- Sensor size — derives focal-length-equivalent values.
Observer
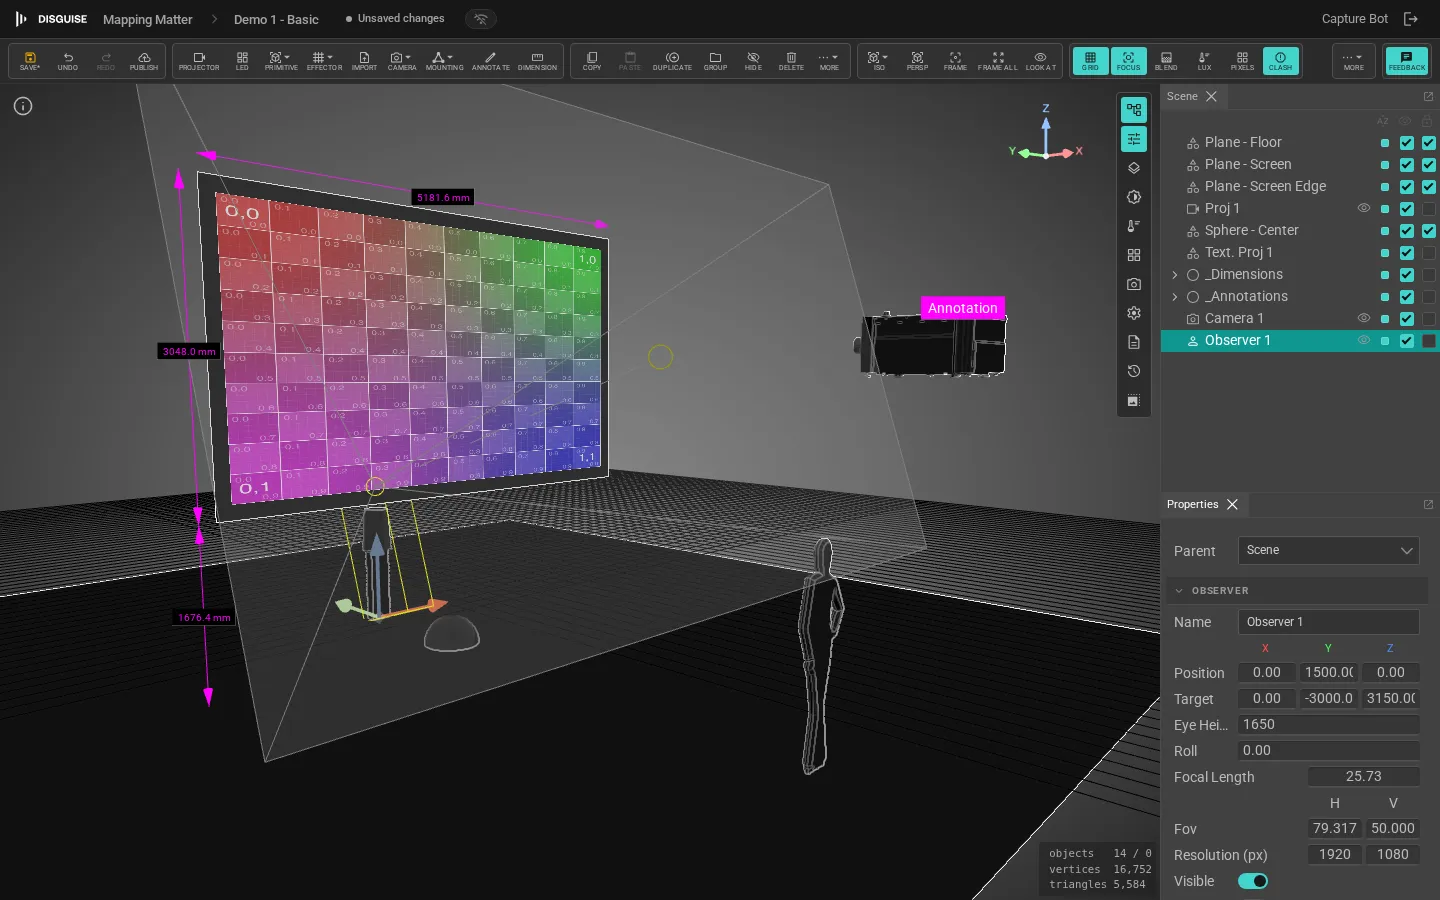
Section titled “Observer”An Observer is a person object with the camera mounted at eye level. Use it to walk through the scene from a real human viewpoint, validate sightlines, and run human acuity analysis.
Add one from the toolbar’s Camera popover and pick Observer. A simple person figure appears in the scene with a head, torso and a forward sight line emerging from the eye position.
When you aim the Observer up or down, the body stays standing upright and only the head pivots toward the target — the figure looks where the camera is looking without leaning over.
Observer properties
Section titled “Observer properties”- Position — XYZ of the figure’s feet.
- Target — XYZ of the aim point the observer is looking at.
- Eye Height — height above the floor in the active scene unit. Defaults to 1650 mm (95th-percentile standing adult).
- Roll — head roll.
- Focal Length / Zoom — perspective focal length, or zoom factor for an orthographic observer.
- Resolution (px) — H × V pixels for rendered output.
Look from the observer’s eyes
Section titled “Look from the observer’s eyes”Select an Observer and click Look from in the saved views strip (or use the eye-icon button on the Observer row in the Scene panel). The viewport jumps to the observer’s eye position, hides the figure’s body mesh, and locks the camera to the observer.
While looking from an Observer:
WASD— walk forward / left / back / right at floor level.- Mouse look — click the toolbar’s Mouse look button to capture the cursor for free look-around. Click again or press
Escapeto release. - Lock projector view — pins the Observer view so accidental viewport clicks don’t move it.
- Exit — leave look-from mode and return to the previous Perspective view.
Human acuity analysis
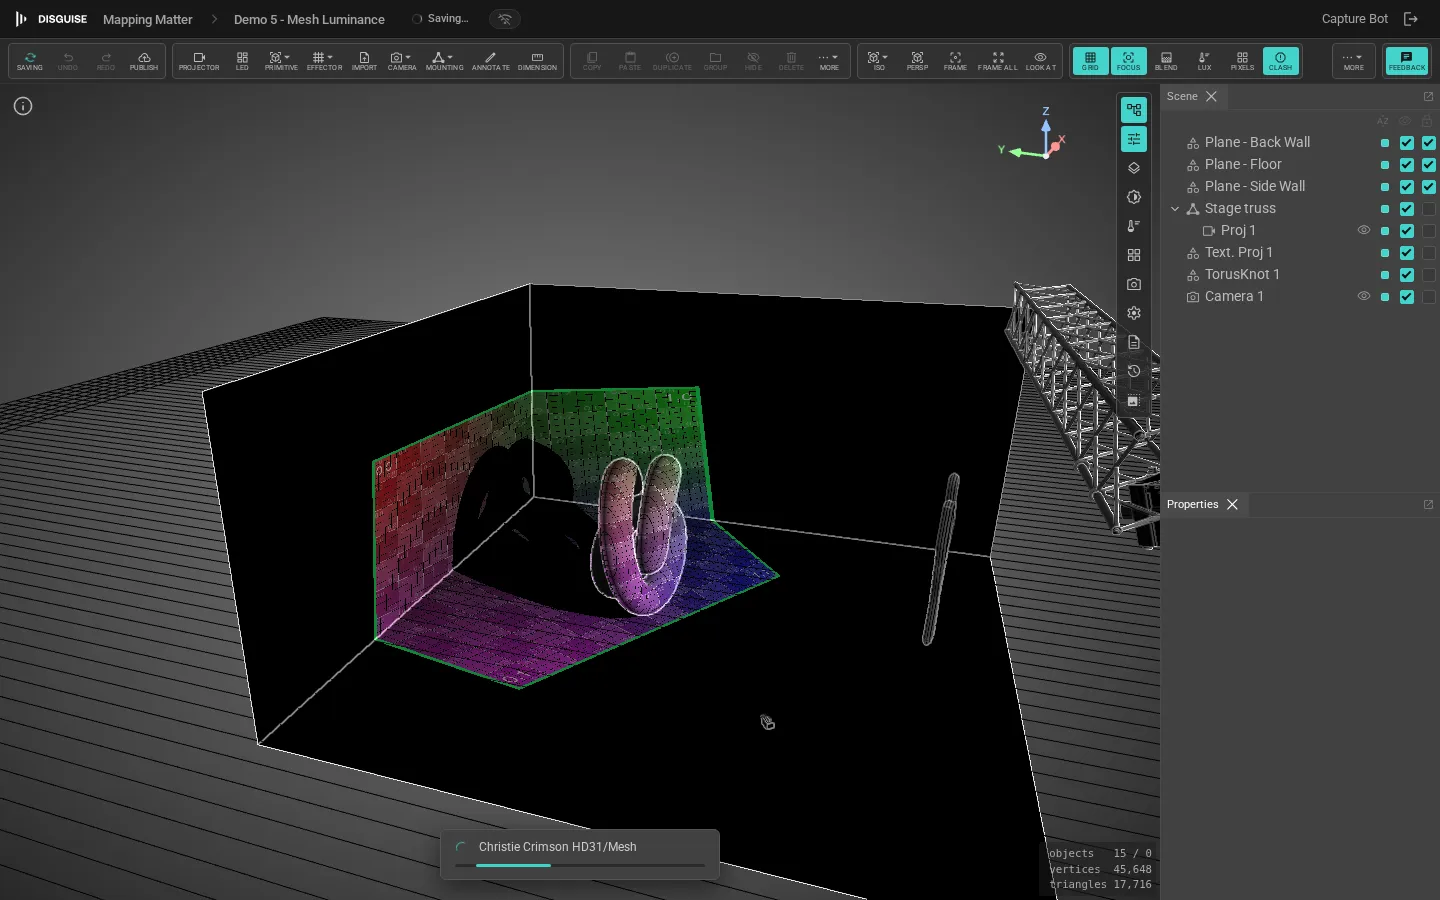
Section titled “Human acuity analysis”When looking from an Observer, the toolbar exposes the Acuity button. Click it to colour-code every projected pixel and every LED pixel by how its apparent angular size compares to human visual acuity (1 arcminute, the 20/20 threshold). LED tiles and projected surfaces are tinted together so you can compare resolutions in a mixed rig. See Viewport & analysis — Human acuity for the colour key and what each band means.
See also
Section titled “See also”- Projectors
- Viewport & analysis — photometric, projection accuracy, brightness, and human acuity
- Export & PDF layouts